Adobe
Robohelp is a Help Authoring Tool (HAT). It is used to create help file for
desktop or web-based applications. You can author your own content, track and
manage project file and build up navigation such as links, table of contents,
indexes and browser sequences.
IMPORTING A WORD DOCUMENT
TO ROBOHELP:
You
can import a word document to robohelp and this can be converted to chm and HTML formats. This section will illustrate the step by step procedure for importing
a word document to robohelp.

The
following window appears.

In
the “New” tab select “Blank Project”. Click on “Import” tab.
Select
the word document to be imported.
As
soon as the file is selected, the “Content Settings” dialog box appears as
shown below.

Check
the following options; Convert Table of Contents, Convert Index and Convert
Glossary; this will enable you to convert the word document content settings
exactly to robohelp.
Click
on “Next” button and the following window appears.
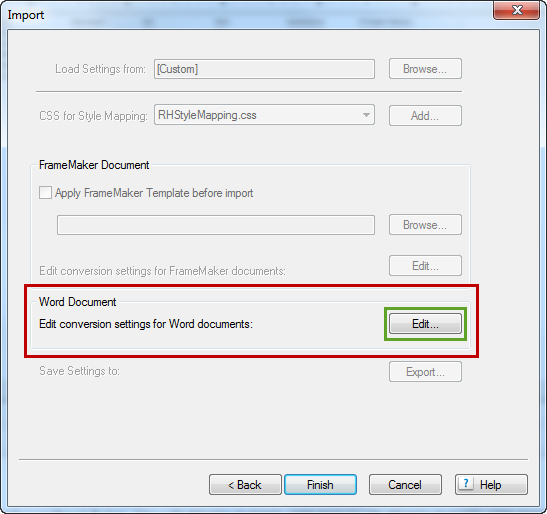
Click
on “Edit” button to edit the conversion settings for the word document.
The
“Conversion Settings” screen appears as shown below.

Click
on “Paragraph” option. You will find the document headings that you had used in
word document.
The
heading names appears as “Heading 1”, “Heading 2” and “Heading 3”.
Select
the heading and the page appears as shown below.

Select
the “Pagination” option. This will create a separate new page/link for each “Heading
1”. Similarly assign pagination for the other two headings.
Click
on “Other Settings” option and the window appears as shown below.
Check
the options “Convert Header” and “Convert Footer” to convert the header and
footer settings of word to robohelp.
Click
on “OK” button.

Then
click on “Finish” button.

The
settings chosen by you will get processed and the file getting imported appears
in a pop up window as shown below.

Click
on “Close” button. Now the word document contents are available in robohelp. In
the “Project Manager” pod, you can view your project file under the HTML files
folder. Click on the folder to view file content.

Make
the required changes in the content if any. In order to convert the file to
html format (default output format), you need to generate the file.
Click
on “Generate Primary Layout” symbol in the tools ribbon as shown below.

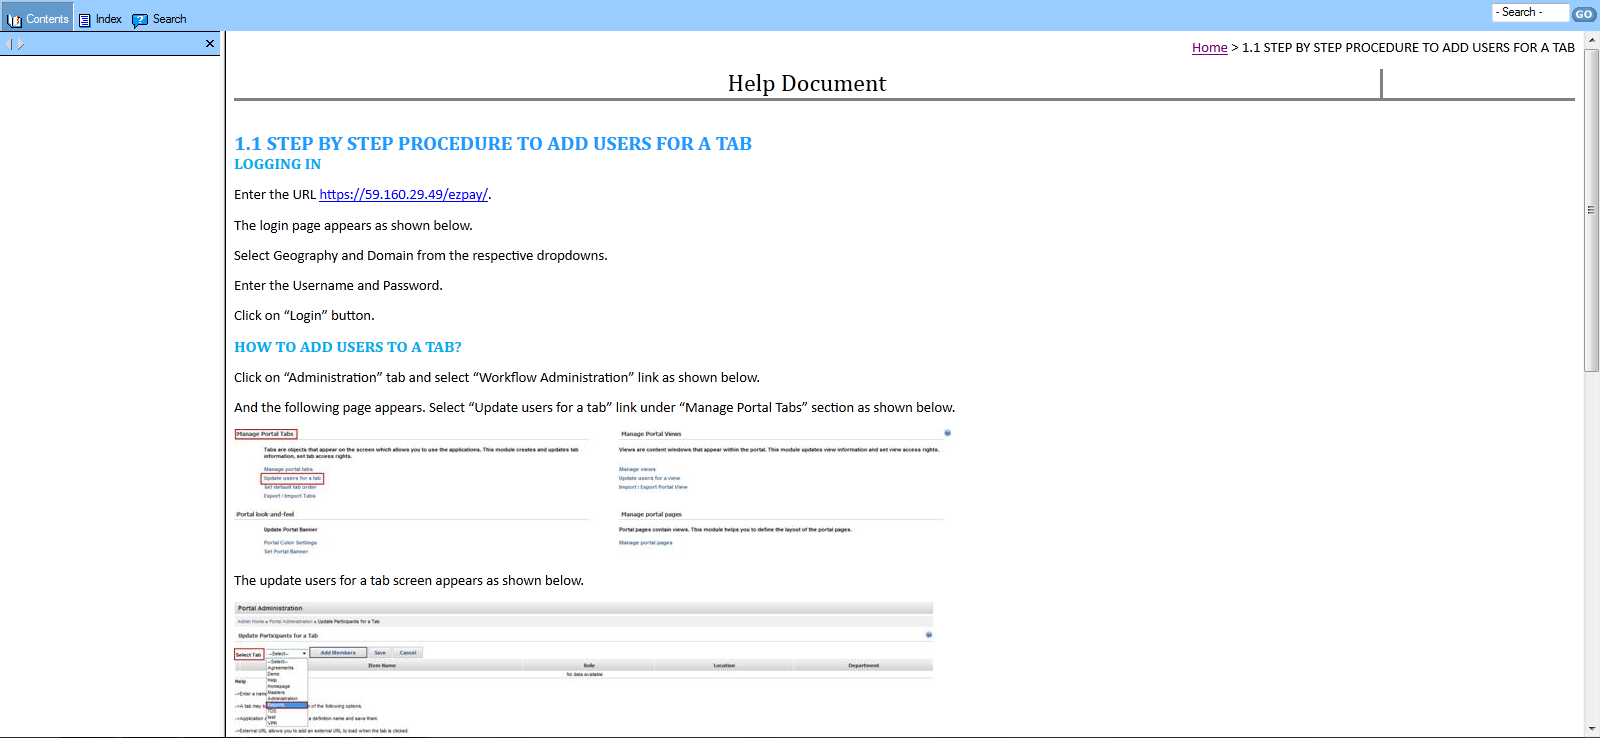
When
the file gets compiled the following message appears as shown below saying that
the HTML help file is built successfully.

Click
on “View Result” button to view the output file.
No comments:
Post a Comment